So, I have a very bad habit of learning about something, listening to a song, reading a book, whatever it may be, and if I REALLY like it, it's all I'll focus on for a while. I listened to nothing but Neon Trees for like two weeks before Frank Sinatra came in and stole the show. This week it's been rag quilts. My sister showed me how to do them when I was in Utah and now I can't stop. I've had a few requests for a tutorial of sort, so here goes. Please remember I'm not a sewer, I just do what I've been told. So take a stiff drink and let's get started.
The first question you'll what to know the answer to is, "How much material do I need?" Answer? I have no clue. I just buy material and make squares and when I'm out, the quilt is done. I'm sure there's a science to it somewhere, but I have no idea. Start small and buy flannel. You can use other cotton materials, but flannel works the best, so start there. Let's say for this pattern buy about one yard of a patterned flannel and two yards of a solid flannel. You'll need twice as many solid squares as patterned squares. Also, here are some materials you'll need - the blue thing is to measure your squares and to cut the squares so you don't ruin your table. The yellow thing is a rotary cutter, I think, and the circle part is a mother load blade that cuts through material like butter, and the clear thing helps to keep the material in place while you're cutting. You can get all these things at Walmart...or if you don't want to invest until you're sure you can do this, borrow them from a friend like I did.

 |
| Measure the material to make 6x6 inch squares. Remember, you'll need twice as many solid as patterned squares. |
|
|
 |
| You should have a hella lotta squares. | | | |
|
|
Before you begin sewing, it's important to lay out your pattern. This becomes more important if you're adding more than one pattern and want it to be random, but it's a good habit to get into. For this blanket I did seven squares by seven squares and just alternated the pattern.
Next, gather each square, starting at the left hand side and place each square ON TOP of the next one until you've gone down the line, then starting at the top, add each group ON TOP of the one below it. This will form the top of the blanket. For this blanket, the back is all the same color, but if you wanted to do a pattern on the back you would do the same thing and then make sure you remember, or mark, which squares are the front, and which ones are the back.

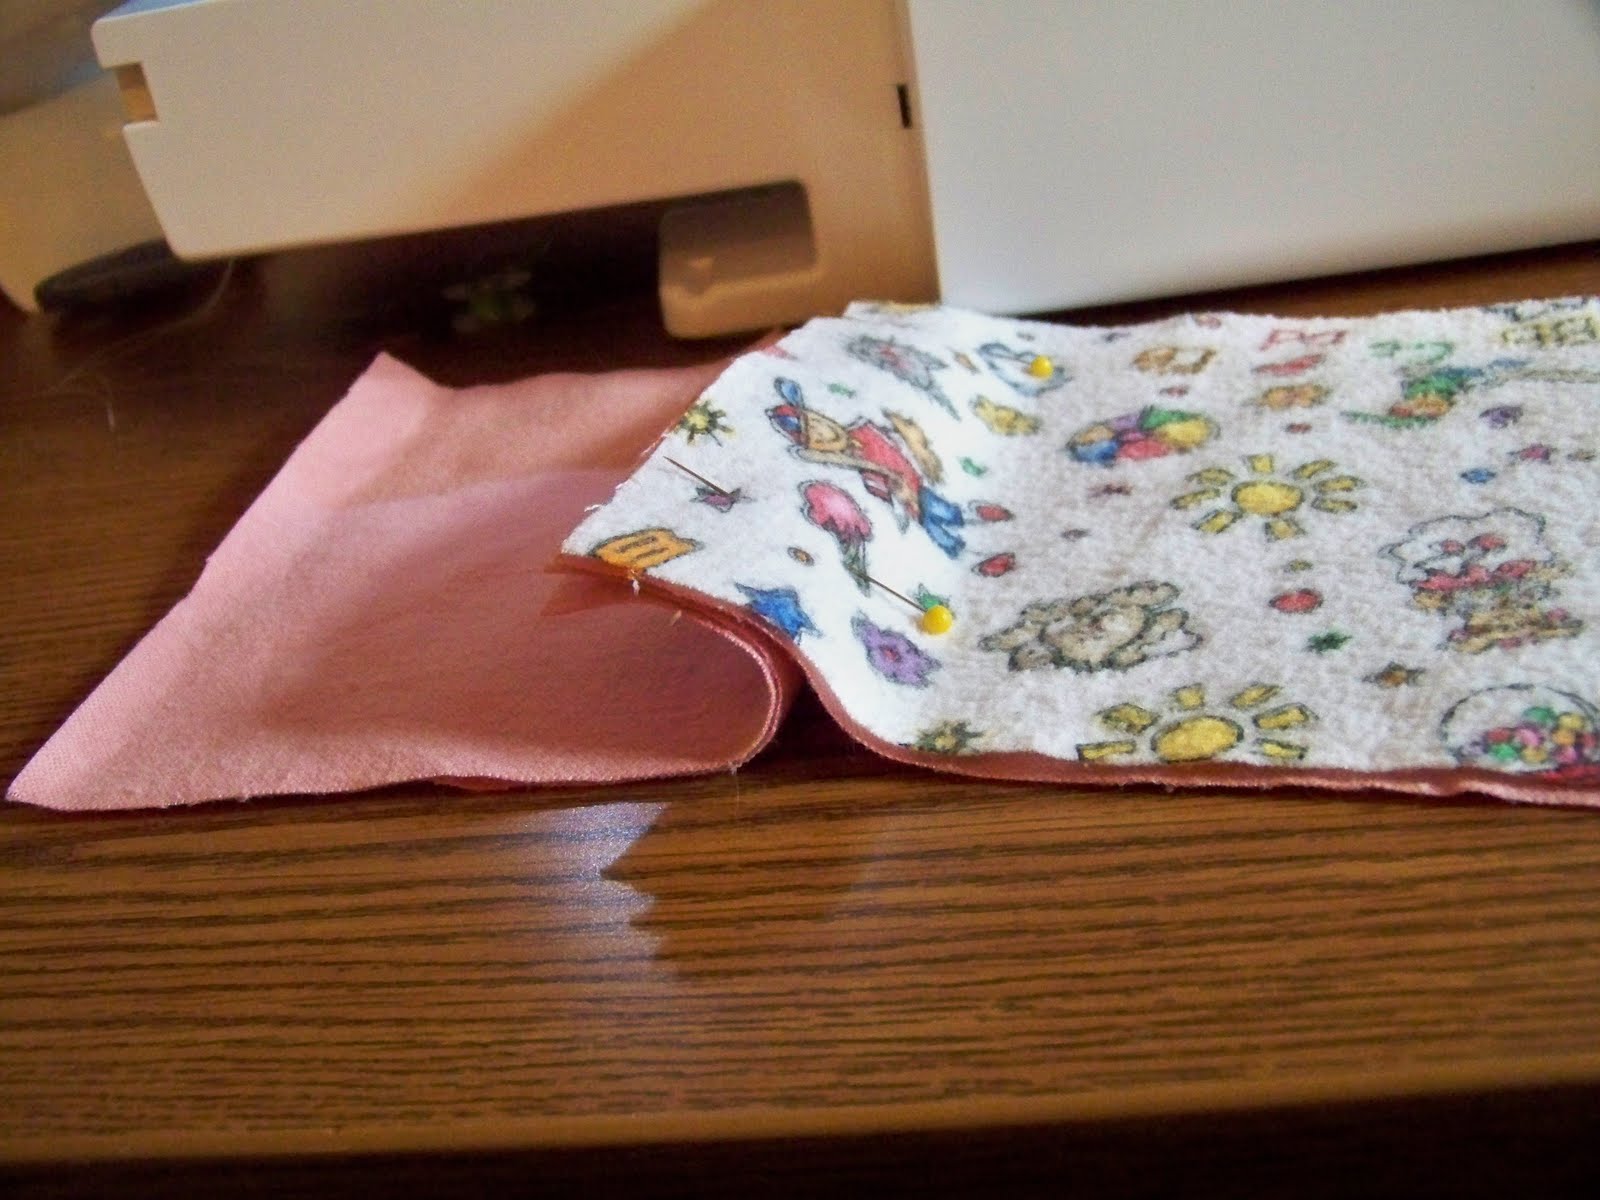
Ok, it's time to get going. When putting the blanket together you will put a front square facing down, followed by two back side squares and finally a front square facing up...does that make sense? The gist, as seen in the picture, is to have the front of your blanket facing upwards and pinned together so there will be about a quarter of an inch of material sticking up. I told you I'm not a sewer. Pin the material on either side and then sew with a straight stitch, leaving, like I said, about a quarter inch. When you're done, it should look like this...
Flip this piece over and add a back square and then a front square, front side up, pin it, and sew it again the exact same way. Continue doing it until you have all seven squares sewn together like this...
Now you're going to start all over again with the next row. Remember, if you're pattern for line one was solid, pattern, solid, then the next line should be pattern, solid, pattern. I know you probably know this, but I'm not that smart ;)
Now it's time to sew these two rows together. This picture is kind of blurry, but you need to pin the seams together, making sure the back sides of the rows are touching each other. Push the seems together and then get your push pins and pin each 1/4 inch strip down - two on the left and two on the right, like this...
Does that make sense? Do the same thing along the entire row...it should look like this when you're done pinning...
Now you want to sew leaving again, about 1/4 inch of material on the side. When you're done it should look like this...
Continue doing this with the next five rows...sew each square into a row of seven, then attach that row of seven to the blanket. When it's all done this is what it should look like...
Next you need to sew around the edges, again 1/4 inch around the ENTIRE blanket. The corners should cross like this...
Finally all the sewing is done! Now comes the REALLY annoying part. You need to cut all those damned edges and it's annoying...and takes forever. Make sure you have good scissors. Yours may or may not be able to cut through four layers of flannel. If it can't, just cut through two, and then two again. You'll want to go almost to the stitching, like this...
...and the cuts should be about this close together...
Do this to every edge of the blanket and I mean every edge of the blanket until it's all cut and looks like this...
Now you need to throw it in the washing machine, by itself because flannel sheds like no other, and throw it in the dryer. When it comes out it will look like you totally know how to sew!
You totally just made a rag quilt and now everyone will think you're totally amazing! It's pretty easy, huh? I know my instructions may not be very clear, so call me, if you're lucky enough to have my number, or post your questions and I'll answer and if I can't, well, then I'll ignore you until you go away. Happy rag quilting!


 ...
...


